The modern kitchen has evolved far beyond its original function as a space for cooking—it’s now a hub for entertainment, creativity, and self-expression. And one of the boldest innovations transforming this space today is Digital Screen Kitchen Floors.
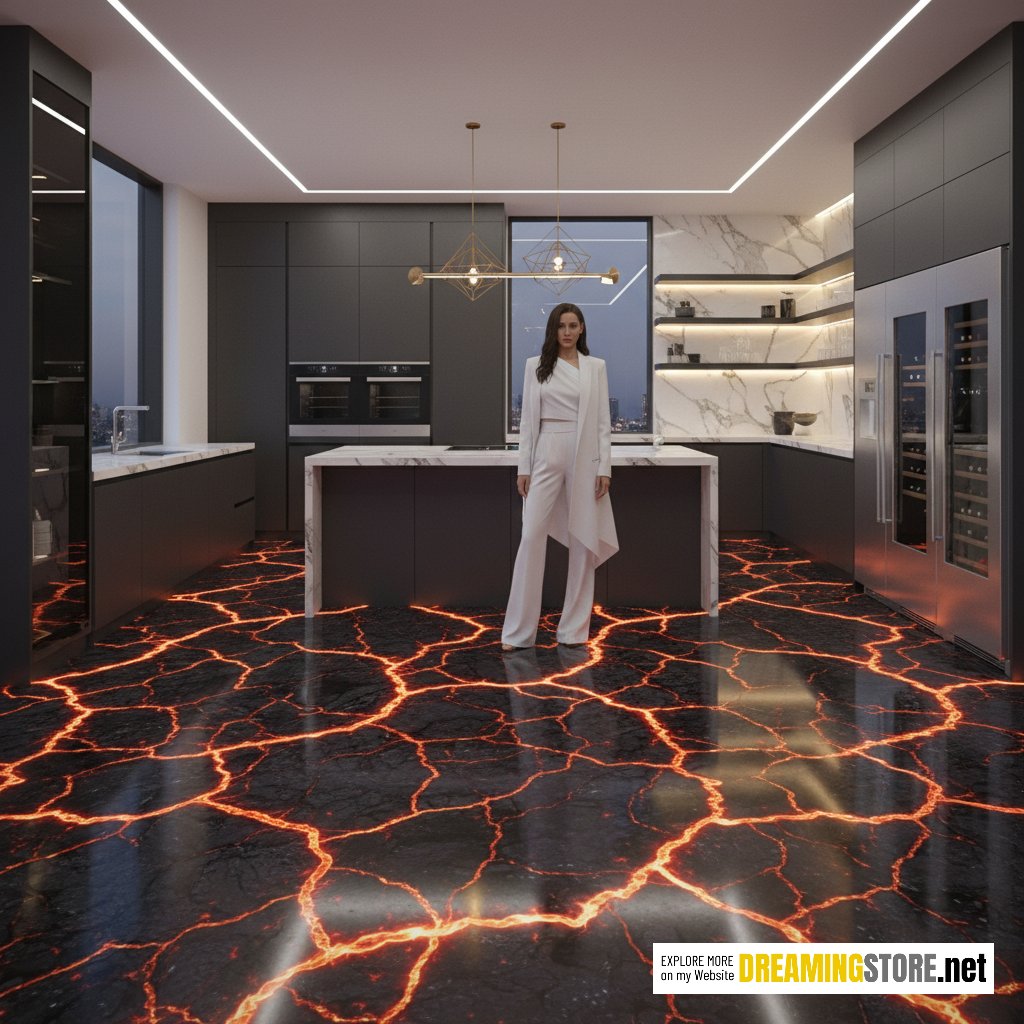
Imagine stepping onto a surface that reacts to your movement, displaying flowing water, glowing lava, or even a virtual garden that shifts beneath your feet. It’s not just a floor anymore—it’s an experience. As homeowners continue to seek futuristic and customizable design elements, Digital Screen Kitchen Floors have emerged as a powerful statement of luxury, technology, and personal style.
But as this technology becomes more accessible, one question dominates the minds of many design enthusiasts and homeowners alike: should you install your Digital Screen Kitchen Floor yourself, or hire a professional installer?
This guide breaks down every aspect—from the technology and materials behind these captivating floors to cost comparisons, installation steps, and long-term maintenance—to help you decide whether to go DIY or pro.
What Are Digital Screen Kitchen Floors?
At their core, Digital Screen Kitchen Floors are advanced flooring systems that integrate high-resolution LED or LCD panels beneath a protective, transparent surface—usually tempered glass or epoxy resin. These screens are connected to a smart control hub that allows users to project vivid, moving imagery right underfoot.
The possibilities are endless:
-
Flowing rivers or cascading waterfalls (perfect for nature-inspired kitchens)
-
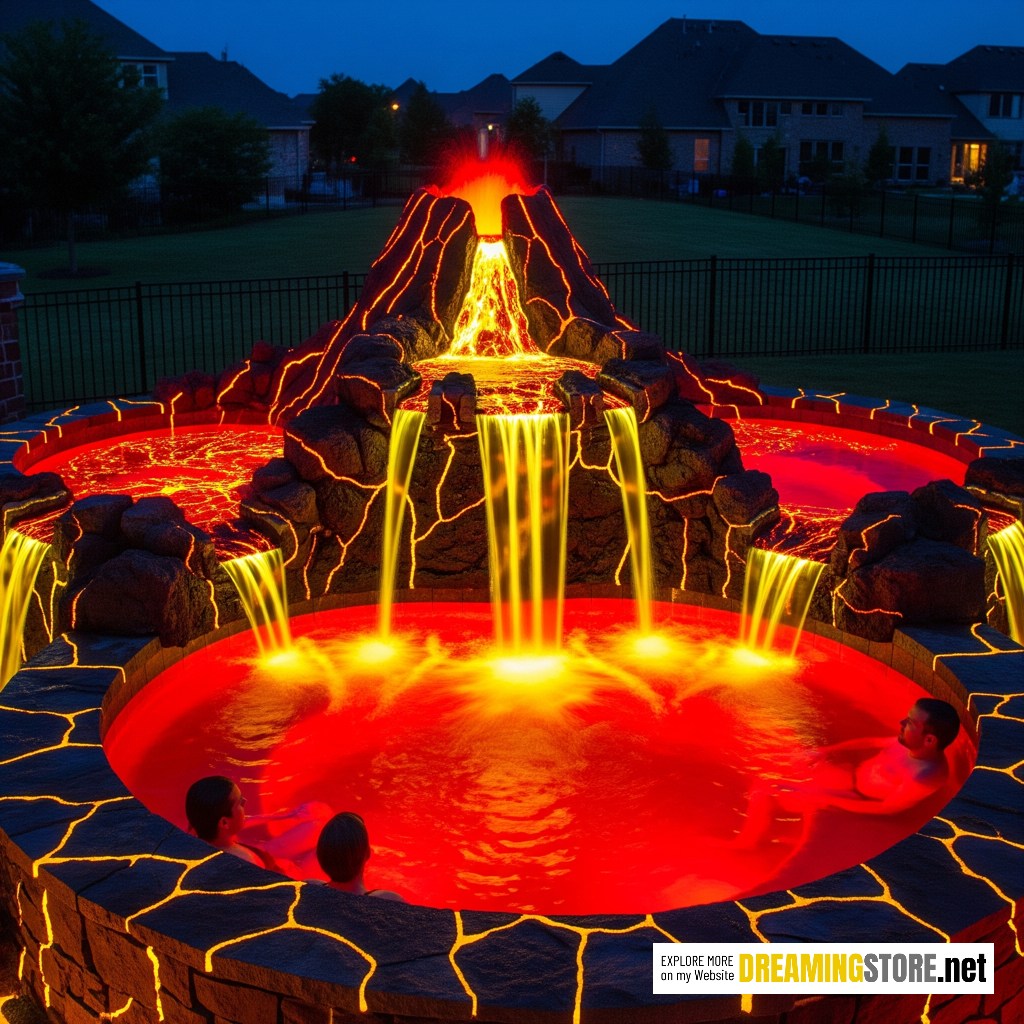
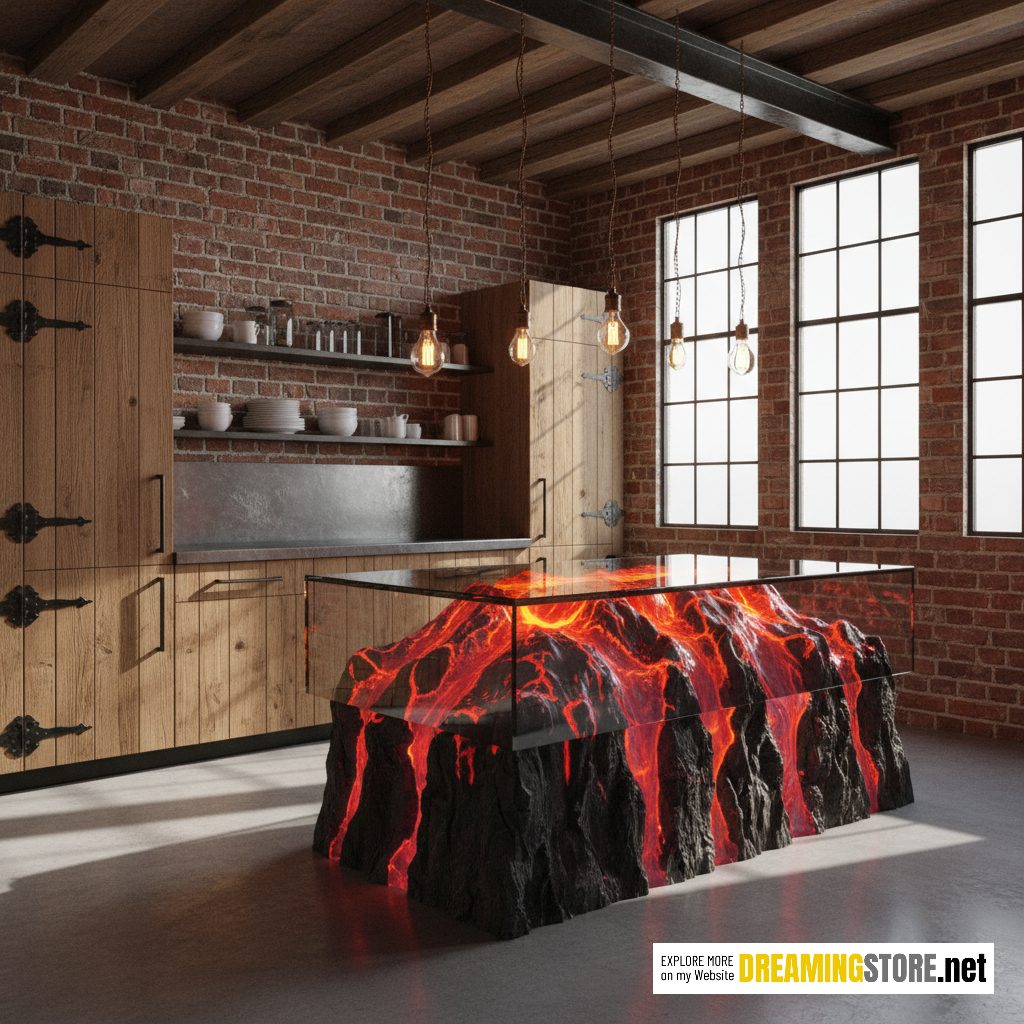
Molten lava effects for a dramatic, modern look
-
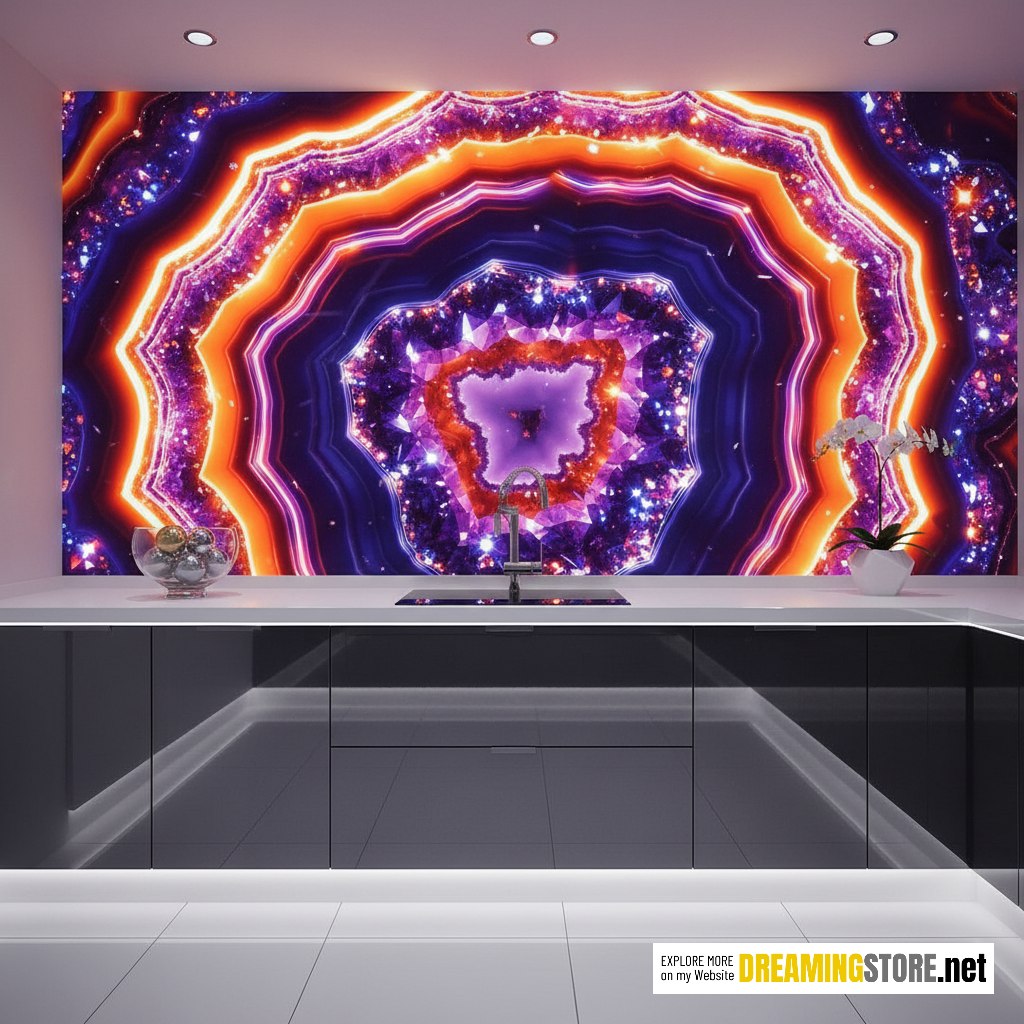
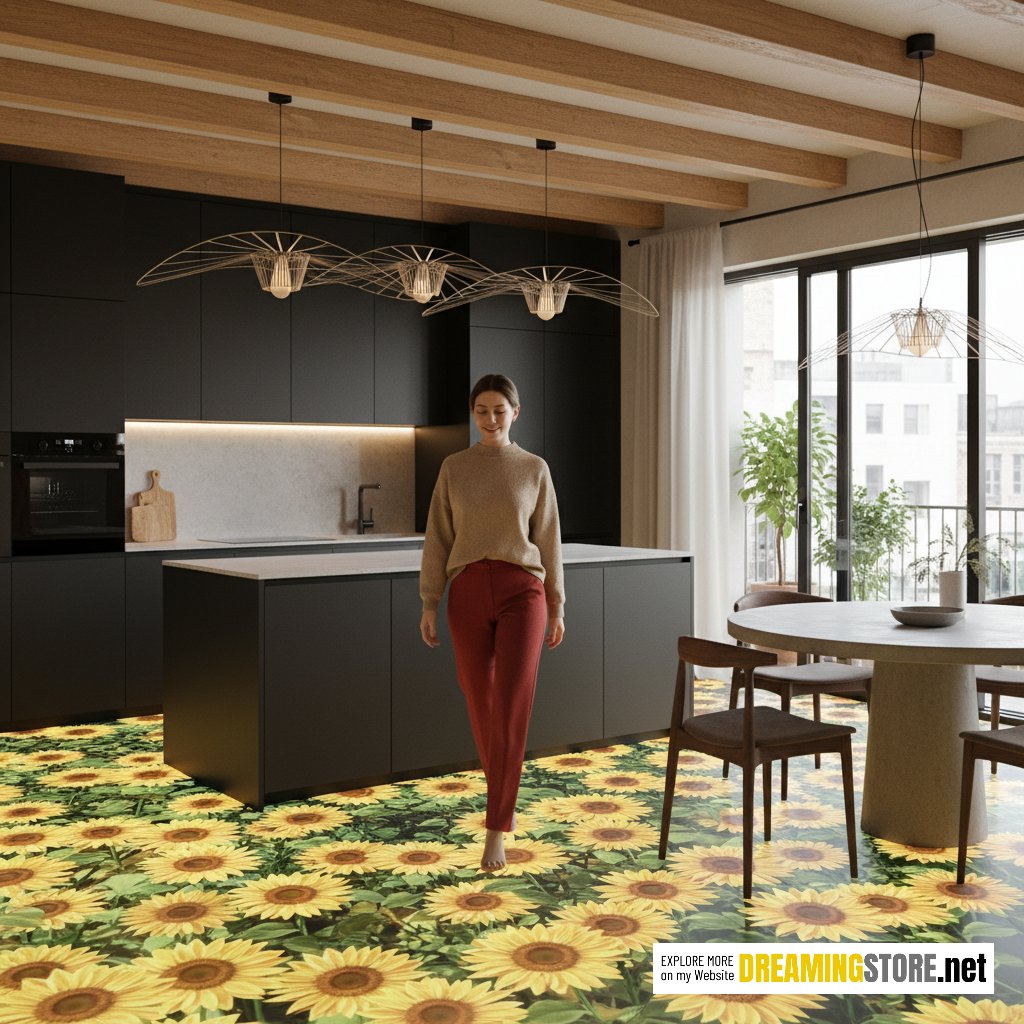
Sunflower fields, galaxy patterns, or ocean waves for themed designs
-
Even personalized family photos, digital art, or brand logos for commercial spaces
Many of these floors also include motion sensors, pressure response, and interactive visuals, turning everyday cooking into an immersive digital art experience.
The Technology Behind the Beauty
The seamless illusion of Digital Screen Kitchen Floors comes from a sophisticated combination of durable construction and smart integration. Here’s what makes them work:
1. Display Layer
This layer consists of LED or OLED screens arranged in modular panels. Each tile emits ultra-bright visuals with rich contrast and a wide color range.
2. Protective Surface
To withstand foot traffic and spills, the screens are sealed beneath scratch-resistant, anti-slip glass or epoxy. These materials are impact-resistant and rated for heavy use in residential or commercial kitchens.
3. Smart Control System
The floor connects to an app or home automation network. You can easily switch between different visuals—lava, waterfall, galaxy, or forest—through a smartphone or voice command system.
4. Thermal and Moisture Protection
Each panel is designed with sealed edges to prevent heat, steam, or water from penetrating the electronics, ensuring long-term reliability even in humid environments.

Why Homeowners Love Digital Screen Kitchen Floors?
There’s no denying that these floors are futuristic, but their appeal goes far beyond aesthetics. Here are the main reasons why homeowners are investing in this high-tech flooring:
-
Unmatched Visual Impact: Instantly transforms an ordinary kitchen into a high-end showpiece.
-
Customizable Themes: Allows endless visual options—change your floor design with a tap.
-
Durability: Designed for long-term use with anti-slip, anti-scratch, and moisture-sealed features.
-
Smart Integration: Works with voice assistants like Alexa, Google Home, or integrated smart home systems.
-
Resale Appeal: Adds a unique luxury feature that elevates property value and modern appeal.
DIY Installation: What You Need to Know
If you’re a tech-savvy homeowner or love tackling home improvement projects, installing Digital Screen Kitchen Floors yourself can be an exciting challenge. However, it’s important to know what’s involved before diving in.
1. Preparation and Planning
Start by measuring your kitchen floor precisely. The modular panels need to fit perfectly without leaving visible seams or gaps. Also, ensure your subfloor is level, clean, and capable of supporting the weight of tempered glass or epoxy layers.
2. Electrical Setup
These floors require proper electrical wiring for both power supply and data transmission. You’ll need to install a control box (usually hidden under cabinetry) that connects the panels to your home’s main power source.
3. Panel Placement
Each digital tile connects using plug-and-lock connectors. The panels must align precisely, ensuring seamless continuity in display visuals.
4. Sealing and Surface Coating
Once the panels are installed, the surface is sealed with clear epoxy resin or a protective glass overlay. This step requires precision and timing—air bubbles or uneven application can affect both aesthetics and safety.
5. Software Configuration
You’ll set up your smart control app, sync the panels, and calibrate brightness, animation speed, and motion sensors.
Tip: Always read the manufacturer’s manual carefully before beginning, and ensure you have someone to help with handling heavy panels.
The Pros of Going DIY
-
Cost Savings: You can save between 20%–40% of total installation costs.
-
Creative Control: You’ll decide every aspect—from layout and visuals to software setup.
-
Personal Satisfaction: For DIY lovers, installing Digital Screen Kitchen Floors can be a rewarding accomplishment.

Digital Screen Kitchen Floors: The Cons of DIY
-
Electrical Risk: Mistakes in wiring could damage panels or cause short circuits.
-
Complex Installation: Aligning and sealing panels without gaps is extremely precise work.
-
Limited Warranty: Many manufacturers void the warranty if the system isn’t installed by a certified professional.
Professional Installation: When Expertise Matters
Hiring an expert installer ensures that your Digital Screen Kitchen Floor performs flawlessly for years to come. Professionals bring not only technical knowledge but also specialized equipment and experience with complex flooring systems.
1. Expert Electrical Integration
Certified installers know how to handle the wiring safely, preventing overheating or connection failures.
2. Perfect Leveling and Alignment
Pro teams use laser leveling systems to ensure the surface is perfectly flat—essential for seamless visuals and safety.
3. Precision Sealing
Professionals use industrial-grade sealants and vacuum techniques to achieve a perfectly clear, bubble-free finish.
4. Software Calibration and Maintenance Setup
Installers set up the software correctly, calibrate visuals, and connect your system to your home automation network without errors.
Cost Breakdown: DIY vs. Pro
| Factor | DIY Installation | Professional Installation |
|---|---|---|
| Average Cost per sq. ft. | $60–$90 | $100–$160 |
| Labor | Self-installed | Included in package |
| Tools & Materials | $400–$800 | Usually included |
| Warranty | Limited or void | Full coverage |
| Estimated Completion | 2–3 days | 1 day |
| Visual Calibration | Manual | Expert setup |
| Safety & Durability | Varies | Guaranteed |
On average, a full Digital Screen Kitchen Floor installation ranges between $6,000 to $12,000 depending on size, display quality, and custom design requests.
Safety and Energy Efficiency
One of the most common questions homeowners ask is whether these floors are safe. The answer is yes—when installed correctly.
-
Temperature Regulation: Built-in thermal sensors prevent overheating.
-
Slip Resistance: The surface texture ensures traction, even when wet.
-
Low Power Consumption: LED-based panels use less energy than typical underfloor lighting.
-
Shock Protection: Layers of insulation and tempered glass make the surface completely safe for walking barefoot.
Real User Experiences | Digital Screen Kitchen Floors
Homeowners who have embraced Digital Screen Kitchen Floors often describe them as “transformative.”
“Walking into my kitchen feels like stepping into another world. I start every morning walking on a digital ocean that moves as I do—it’s calming and surreal.” — Olivia M., San Diego
“We went with a lava-inspired theme for our modern kitchen. The visual warmth paired with black marble cabinetry creates an incredibly bold aesthetic. Worth every penny.” — Daniel K., Toronto
“The installation was handled by a professional, and I’m glad I didn’t attempt DIY. The system syncs beautifully with our smart home and adjusts brightness automatically.” — Mila R., Berlin
Variants & Customization Options
Modern Digital Screen Kitchen Floors are available in multiple styles, shapes, and software versions.
1. Visual Themes
Nature-inspired (forest, waterfall, beach)
Futuristic (galaxy, neon grids, abstract art)
Artistic (animated patterns, 3D illusions)
2. Interactive Modes
Motion-reactive: Visuals change as you walk.
Music-synced: Animations pulse to your playlist.
Mood Lighting: Syncs with your kitchen’s ambient lighting system.
3. Material Options
Tempered Glass: Glossy, premium appearance with maximum transparency.
Epoxy Resin: Softer finish, customizable color tint, easier for DIY setups.
Digital Screen Kitchen Floors: Installation & Compatibility
Digital Screen Kitchen Floors are designed to integrate seamlessly with existing home systems. They can be installed over most subfloor materials, including concrete, ceramic, and laminate bases.
They are also compatible with:
-
Smart lighting systems (Philips Hue, LIFX, etc.)
-
Voice assistants (Google Home, Alexa, Siri)
-
Custom kitchen cabinetry and islands
If you’re remodeling an older home, professional installers can retrofit the panels with custom fittings to match uneven layouts or unconventional kitchen shapes.
DIY or Pro? Which Should You Choose?
Ultimately, your decision depends on your comfort level with technology, budget, and expectations for precision.
-
Choose DIY if you have technical confidence, want to save on labor, and enjoy hands-on projects.
-
Choose Professional Installation if you prioritize flawless visuals, warranty protection, and long-term reliability.
For most homeowners, the professional route offers peace of mind and ensures that the stunning visuals of Digital Screen Kitchen Floors perform perfectly from day one.
As the line between technology and design continues to blur, Digital Screen Kitchen Floors represent a bold step into the future of home interiors. They fuse creativity, interactivity, and elegance—inviting you to transform your kitchen into a living digital landscape that reflects your personality and mood.
Whether you choose to DIY or hire a pro, the result will be the same: a floor that inspires awe, sparks conversation, and brings digital artistry to everyday life. Because in 2025, your kitchen isn’t just where you cook—it’s where technology meets imagination.